Welcome to the Hunter Ceiling Fan Manual, your comprehensive guide to installing, operating, and maintaining your ceiling fan․ This manual ensures optimal performance, safety, and energy efficiency, while providing detailed instructions for a seamless experience with your Hunter fan․
1․1 Overview of Hunter Ceiling Fans
Hunter Ceiling Fans are renowned for their high-quality design, durability, and advanced features․ They offer a range of styles to suit any home decor, from traditional to modern aesthetics․ With options like energy-efficient motors, quiet operation, and smart home integration, Hunter fans provide both comfort and convenience․ Additionally, they feature customizable settings and various mounting options, ensuring a perfect fit for any space․ These innovations make Hunter Ceiling Fans a reliable choice for enhancing home comfort and efficiency․
1․2 Importance of Reading the Manual
Reading the Hunter Ceiling Fan Manual is essential for safe and proper installation, operation, and maintenance․ It provides critical information on safety precautions, troubleshooting, and optimal performance․ The manual ensures you understand all features, including energy-saving settings and smart home integration․ By following the guidelines, you can avoid potential hazards and enjoy your fan’s full benefits․ Take time to review it thoroughly before installation and use․
1․3 Safety Precautions
Always follow safety guidelines when handling your Hunter ceiling fan․ Turn off power at the circuit breaker before installation or maintenance․ Use the provided mounting bracket to ensure stability․ Avoid overloading circuits, and keep the fan out of reach of children․ Properly balance the fan blades to prevent wobbling․ Adhere to local electrical codes and manufacturer instructions to ensure safe operation and avoid potential hazards․

Installation Guide
Follow these steps to ensure a secure and proper installation of your Hunter ceiling fan․ Use the provided hardware and mounting options for optimal performance․ Refer to the manual for detailed guidance․
2․1 Tools and Materials Needed
To successfully install your Hunter ceiling fan, gather the following tools and materials: a screwdriver, voltage tester, ladder, wire connectors, and a drill․ Ensure you have all screws, brackets, and hardware provided in the box․ Verify compatibility of any additional materials with your fan model․ Always follow safety guidelines and manufacturer instructions for a secure installation․
2․2 Step-by-Step Installation Process
Begin by turning off the power to the circuit at the breaker box and verify wires are de-energized․ 2․ Remove the existing fixture and install the Hunter-provided mounting bracket․ 3․ Hang the fan motor housing and connect the wires according to the manual․ 4․ Secure the fan tightly and attach the blades and light kit․ 5․ Turn the power back on and test the fan’s operation to ensure proper function․
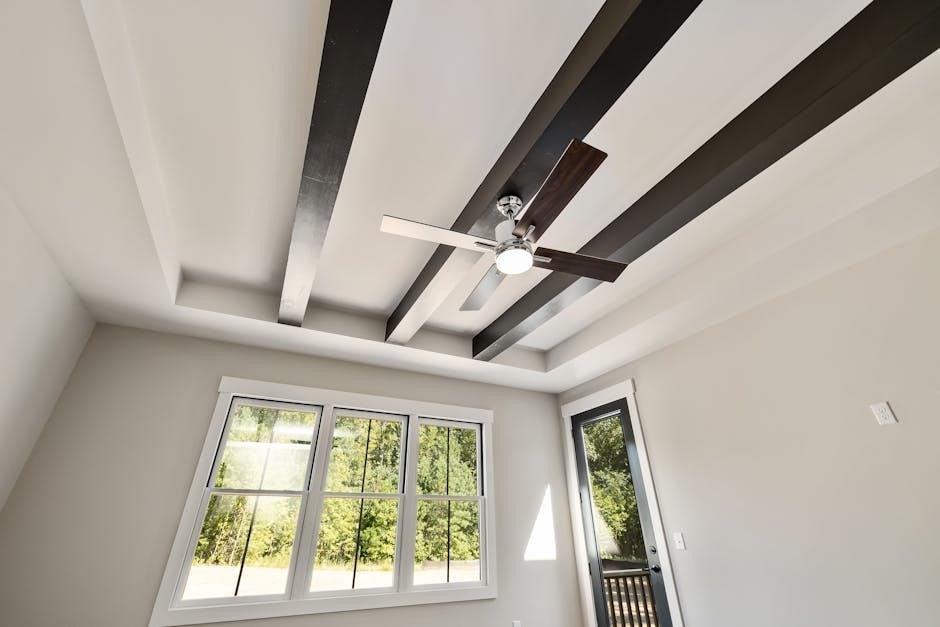
2․3 Mounting Options: Low Profile, Standard, and Angled
Hunter ceiling fans offer three mounting options to suit various ceiling heights and room layouts․ The Low Profile mount is ideal for low ceilings, ensuring minimal clearance․ The Standard mount is versatile for average ceiling heights, while the Angled mount is designed for sloped or vaulted ceilings․ Each option requires specific hardware and adjustments, ensuring stability and proper airflow․ Follow the manual for precise installation instructions tailored to your ceiling type․
Operating Your Hunter Ceiling Fan
Learn to operate your Hunter ceiling fan efficiently with speed adjustments, LED light control, and directional settings for optimal airflow and energy efficiency year-round․
3․1 Understanding Fan Speed Settings
Your Hunter ceiling fan offers multiple speed settings, typically ranging from low to high, to customize airflow according to your needs․ The manual or remote control allows easy adjustment․ Higher speeds increase circulation, while lower settings provide gentle air movement․ Some models feature smart controls for voice or app-based adjustments․ Understanding these settings helps optimize energy efficiency and comfort, ensuring the perfect balance for any room condition or personal preference․
3․2 Using the LED Light Kit
The LED light kit on your Hunter ceiling fan provides energy-efficient illumination․ To use it, ensure the light is properly installed and connected․ Adjust brightness using the remote or wall control․ Some models offer dimming capabilities for customizable lighting․ Regularly clean the LED cover to maintain optimal light output․ Refer to the manual for specific instructions on replacing bulbs or troubleshooting light-related issues․ Proper care ensures long-lasting performance and energy savings․
3․3 Reversing Fan Direction for Seasonal Use
To optimize airflow year-round, your Hunter ceiling fan features a reversible direction setting․ In winter, run the fan clockwise to circulate warm air downward․ In summer, switch to counterclockwise for a cooling breeze․ Locate the direction switch on the motor housing or remote․ Reversing direction enhances energy efficiency and comfort․ Ensure the fan is turned off before changing direction for safe operation․ This feature maximizes air circulation and temperature distribution throughout your space․
Troubleshooting Common Issues
Identify and resolve common issues with your Hunter ceiling fan, such as malfunctioning lights or unusual noise, by checking power sources, balancing blades, and cleaning components․ Consult the manual or contact support for persistent problems to ensure optimal functionality and safety․ Regular maintenance can prevent many issues and extend the fan’s lifespan․
4․1 Fan Not Turning On
If your Hunter ceiling fan isn’t turning on, first ensure the power source is connected and the wall switch is in the “on” position․ Check the remote control or pull chain for proper function․ Verify that no circuit breakers have tripped and that the fan is correctly installed․ If issues persist, consult the manual or contact Hunter customer support for assistance; Regular checks can prevent such problems and ensure smooth operation․
4․2 Fan Making Noise
If your Hunter ceiling fan is making noise, check for loose screws or debris on the blades․ Ensure the fan is properly balanced and clean․ Lubricate moving parts if necessary․ Excessive noise may indicate worn bearings or misaligned components․ Refer to the manual for troubleshooting steps or contact Hunter support for professional assistance․ Regular maintenance can help prevent noise issues and ensure smooth operation of your ceiling fan․
4․4 Light Kit Malfunction
If the light kit on your Hunter ceiling fan is malfunctioning, ensure the LED bulbs are securely installed and the power is turned off before inspection․ Check for loose connections or faulty bulbs․ Verify that the light kit is compatible with your fan model․ If issues persist, consult the manual or contact Hunter customer support for assistance․ Proper installation and maintenance can resolve most light-related problems, ensuring optimal performance and safety․

Maintenance and Care
Regular maintenance ensures your Hunter ceiling fan operates efficiently and lasts longer․ Clean the blades with a soft cloth, lubricate moving parts, and replace bulbs as needed for optimal performance․
5․1 Cleaning the Fan Blades
Regular cleaning is essential for maintaining your Hunter ceiling fan’s efficiency and appearance․ Turn off the power and use a soft, dry cloth to wipe down the blades․ For stubborn dust, dampen the cloth slightly but avoid harsh chemicals or abrasive materials․ Dusting regularly prevents buildup and ensures smooth operation․ Always ensure the fan is turned off before cleaning to avoid accidents or damage․
5․2 Lubricating Moving Parts
Regular lubrication ensures smooth operation and reduces noise․ Use a high-quality silicone-based lubricant on the fan’s moving parts, such as bearings or hinges․ Apply a few drops to the specified areas, as indicated in your Hunter ceiling fan manual․ Avoid over-lubrication, as it may attract dust․ Lubricate every 6-12 months or when unusual noise occurs․ Always turn off the power before performing maintenance to ensure safety․
5․3 Replacing Light Bulbs
To replace the light bulbs in your Hunter ceiling fan, first turn off the power at the electrical panel․ Remove the glass cover or shade, then gently pull out the old bulb․ Insert the new bulb, ensuring it is compatible with your fan’s wattage and type (LED or incandescent)․ Replace the cover and test the light․ Always use bulbs recommended in the manual for optimal performance and safety․
Smart Home Integration
Hunter ceiling fans offer seamless integration with smart home systems, enabling voice control via Google Assistant and compatibility with HomeKit․ This feature allows for convenient operation and customization, enhancing your smart home experience with ease and efficiency․
6․1 Compatibility with HomeKit
Hunter ceiling fans are designed to integrate effortlessly with Apple’s HomeKit, offering a seamless smart home experience․ With HomeKit compatibility, users can control their fans and lights using Siri or the Home app, allowing for convenient scheduling, scene setting, and remote operation․ This feature ensures enhanced convenience and energy efficiency, making it easy to customize your home’s comfort from anywhere․ Hunter’s commitment to innovation makes smart living simple and accessible․
6․2 Voice Control via Google Assistant
Hunter ceiling fans are compatible with Google Assistant, enabling voice control for a hands-free experience․ With a Google Home smart speaker or the Assistant app, you can effortlessly adjust fan speed, toggle lights, and customize settings․ This integration enhances convenience, allowing seamless control of your fan’s operations without lifting a finger, making it a perfect addition to your smart home setup․
6․3 Setting Up Smart Features
To enable smart features, download the Hunter Fan app and follow the in-app instructions․ Ensure your fan is connected to a stable internet network․ Pair the fan with your smart home system, such as Google Assistant or HomeKit, for voice and remote control․ This setup allows you to customize settings, schedule operations, and receive software updates, enhancing your fan’s functionality and integration with your smart home ecosystem․
Warranty and Support
Hunter ceiling fans come with a limited lifetime motor warranty and a 1-year parts warranty․ For support, visit Hunter’s official website or contact their customer service team for assistance with replacements, repairs, or troubleshooting․
7․1 Understanding the Warranty Terms
Hunter ceiling fans are backed by a limited lifetime motor warranty and a one-year warranty on parts․ This coverage ensures protection against manufacturing defects, providing peace of mind for your investment․ The warranty applies to the original purchaser and requires proper installation by a licensed professional․ For complete details, refer to the official Hunter website or contact customer support․
7․2 Contacting Hunter Customer Support
For assistance, contact Hunter Customer Support through their official website or by phone at 1-800-296-5171․ Representatives are available Monday-Friday, 8 AM-6 PM EST, to help with troubleshooting, repairs, or general inquiries․ Visit the support section on the Hunter website for FAQs, manuals, and repair resources to address common issues or schedule service․
7․3 Finding Replacement Parts
To find replacement parts for your Hunter ceiling fan, visit the official Hunter website or authorized retailers․ Use the model number from your fan to ensure compatibility․ Common parts like blades, light kits, and remote controls can be purchased directly․ Contact Hunter Customer Support for assistance in locating specific components or to verify availability․ Always use genuine Hunter parts to maintain warranty validity and ensure optimal performance․

Advanced Features
Hunter ceiling fans offer advanced features like energy-efficient motors, quiet operation technology, and customizable settings․ These enhancements provide superior performance, noise reduction, and personalized comfort for optimal user experience․
8․1 Energy Efficiency and Savings
Hunter ceiling fans are designed with energy efficiency in mind, featuring advanced motor technology that reduces power consumption while maintaining high performance․ By circulating air effectively, these fans can lower cooling costs in summer and heating costs in winter, contributing to significant energy savings over time․ Their eco-friendly design ensures long-term sustainability and reduced environmental impact․
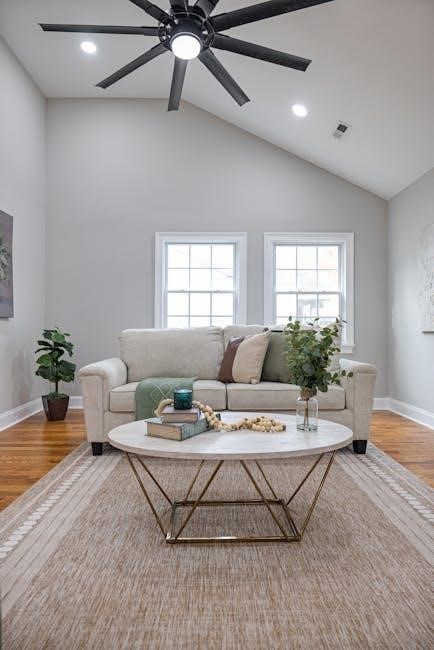
8․2 Quiet Operation Technology
Hunter ceiling fans utilize WhisperWind motor technology, ensuring ultra-quiet operation while delivering powerful airflow․ This advanced design minimizes noise levels, providing a peaceful environment for any room․ The fan’s smooth, silent performance is achieved through precision engineering and high-quality components, making it ideal for bedrooms, living areas, and offices where quiet operation is essential for comfort and productivity․
8․3 Customizable Settings
Hunter ceiling fans offer customizable settings for enhanced comfort and convenience․ Adjust fan speed, LED light brightness, and direction using the included remote or smart home integrations․ Program preferred settings for different times of day or seasons, ensuring optimal airflow and lighting tailored to your needs․ These features allow you to personalize your fan’s performance, creating a comfortable and energy-efficient environment year-round․
Congratulations on completing the Hunter Ceiling Fan Manual! This guide has provided you with comprehensive instructions to ensure optimal performance, energy efficiency, and enhanced comfort for years to come․
9․1 Final Tips for Optimal Performance
For lasting efficiency, clean fan blades regularly and ensure proper balance․ Use seasonal settings to optimize airflow and energy savings․ Regularly inspect and maintain moving parts to prevent wear․ Utilize smart features for convenience and energy efficiency․ Always follow the manual’s guidelines for troubleshooting and maintenance to enjoy your Hunter ceiling fan’s full potential for years to come․
9․2 Benefits of Owning a Hunter Ceiling Fan
Owning a Hunter ceiling fan enhances your home’s comfort and aesthetic appeal․ With energy-efficient designs, they reduce energy costs while providing consistent airflow․ Quiet operation ensures a peaceful environment, and durable construction guarantees long-lasting performance․ Advanced features like smart integration and customizable settings offer convenience and modern functionality․ Hunter ceiling fans are a timeless investment, combining style, functionality, and reliability for years of satisfaction․